

Honey Harvest and Processing from Top Bar Hives
One of the most frequently asked questions I hear from our customers is how to harvest and process honey from a top bar hive or a Warre hive. I find this to be one of the simplest and most rewarding aspects of these two beekeeping methods, and I love the fact that I don’t need an extractor, an uncapping tool, foundation or other items to get the job done.
Harvesting honey from a Top Bar Hive
Let me start with honey harvesting from a top bar hive. I generally don’t harvest honey from first year top bar hives unless they are overly full (from one end to the other), or if some of their combs get out of control and need to be removed to avoid future disasters.
I usually harvest in mid to late afternoon on days that aren’t terribly warm. This way there will be fewer bees in the hive to notice their honey being plundered. The honey combs will be at the end of the hive farthest away from the brood nest where the colony was started. Often the last couple combs aren’t fully capped, which means they should generally be left inside the hive. If you go a few bars in you will likely find a comb or two that are fully capped and ready to be harvested. The quickest method and the one I prefer to use is to remove the comb and simply brush the bees off of it. Once they are off I either put it in a sealed Tupperware container or bucket, or take it indoors where the bees can’t get to it. The other method that works is to do the harvest at dusk, just before it gets dark. Remove the comb and set it 5-10 feet from the hive. As long as there is no brood in the comb the bees should quickly evacuate and move back to their hive.
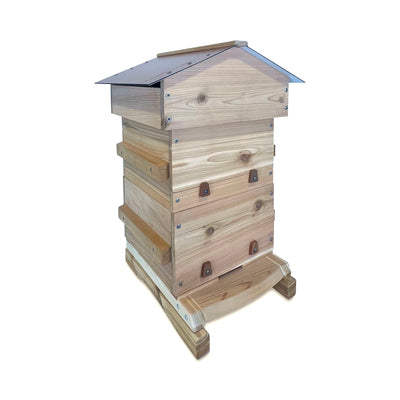
Harvesting honey from a Warre Hive
Honey harvesting from a Warre hive works a bit differently. As part of the Warre system, the empty boxes are added below in the spring and honey-laden boxes are harvested from the top in the fall. This makes for a relatively simple harvest that can yield a tremendous amount of honey (Each box of honey can weigh between 40-50lbs). Much like our top bar hives, we usually don’t harvest from our Warre hives during their first season. A typical Warre hive needs 2-3 boxes in which to overwinter. If the bottom two boxes have plenty of honey, the top box can be harvested as well.
Here in Oregon we generally harvest honey from our Warre hives in September. At dusk I start with a puff or two of smoke in the entrance, wait for a minute and then begin removing the top boxes. Upon removing the top I’ll take off boxes one at a time and place them on their sides 5-10 feet from the hive and use the aforementioned evacuation method to rid the boxes of bees. If the boxes have combs that are removable, you could also remove the combs individually, brush them off and place them indoors or in a sealed container.
Others have used bee escapes with good luck, placing the bee escape between the boxes to be harvested and those below. Over a period of time most of the bees will make their way down through the escape and won’t be able to go back up into the honey stores.
Honey Processing
Honey processing works similarly for both hive styles. Once the combs/boxes are out of the hives, crushing and straining is the next step.
It is easiest to process combs from top bar hives, as you don’t have to deal with removing them from the box. If you’ve got but one or two hives, your most cost-effective method of processing is to use a spoon, two mason jars and some cheese cloth.
Start by cutting the comb from the bar and dropping the pieces into the jar. As you drop them in, crush them up with the spoon to make room for the next piece. Once you’ve filled the jar with smashed up honey comb, attach some cheese cloth or screen over the opening with a rubber band. Now upturn the jar over an empty mason jar and watch as the honey leaks through the cloth and fills up the jar!

To use the same method with combs from a Warre box, start by flipping over the box so the bars are facing downward and the combs are facing upward. Take a knife or hive tool and cut the comb attachments from both sides so that the bars can be removed. At this point you can remove a couple bars at a time, cut the combs off and crush them up in the jar as described before. If your bars are nailed into the hive you can cut the combs out from the underside, as well as through the gaps in the bars from above. It’s best to leave a little comb (1/4 to ½ an inch) remaining on the bars to induce the colony to build in the box next season.
If you have dozens of hives like we do, mason jars aren’t the most efficient method. Instead we use a metal fruit press. Rather than placing the combs in a jar, we place them in the press and smash them up. From there we press the honey out of the comb into a bucket, leaving a small pancake of wax in the bottom of the press that can later be rendered. This allows us to press 15-25lbs of honey at a time, making quick work of the job!

Cut Comb
The other option that works very well with foundationless hives is cut comb honey. I simply take a comb, lay it on a cutting board and cut it into squares.


Leave a comment